July 8th, 2024

5 Tips to Clip In Hair Extensions Like a Pro

By Tatiana Montano

Tatiana M.
July 5th, 2024

5 Tips to Clip In Hair Extensions Like a Pro!

bride with blonde hair on her wedding dear wearing cashmere hair extensions
First time with clip-in extensions? Don't worry! Cashmere Hair is especcially made with every background in mind to be easy to apply for even the most inexpereinced of users. In todays blog, we want to share with you 5 vital tips that can assist you in clipping in your Cashmere Hair extensions and turn you into a pro. Here are some tips here that will help in making the extensions look natural even if you have short hair:

1. Hide and Tuck

If you are someone with short hair, you are likely to have a slightly more difficult time blending your hair with longer hair extensions. Here’s a simple trick to conceal those shorter pieces that tend to stick out underneath:


Tools Needed: A brush, some bobby pins along with a small rubber band.
Steps:
-In this case, part your hair at the back where you intend to install the first track, which is the six-inch track.
-Clip the hair up and out of the way for convenience
-Take the bottom section of hair left out and begin to make a braid all the way to the ends and secure the end with a rubber band.
-Twist and tuck the braid into a circle at the nape of your neck using the bobby pins to hold the hair firmly. This will avoid those blunt shorter pieces of hair from showing.
-Apply the six-inch track on top of the pinned hair, always have all the clips de-clipped before fixing onto it.
-Now, your shorter pieces are out of sight, and you can carry on attaching other parts of the extension normally without fear of them not blending.
woman brushing and styling her hair with the cashmere hair extensions clipped in

2. Match the Texture

To ensure that your Cashmere Hair Extensions can seamlessly blend with your natural hair, you need to style them to match the same texture as your natural hair.


Tip: Cashmere Hair Extensions are made of 100% Remy Human Hair, this means they take on natural wavey textures and can be easily styled without fear of not holding their shape. Clip your extensions into your hair and style your natural hair with the extensions in at the same time for a more uniform appearance.
step by step guide clipping in cashmere hair extensions

3. Clip In with Ease

Extensions should be easy to clip in. Here’s a step-by-step guide to make the process smoother:
Tools Needed: a set of Cashmere Hair Human Hair Clip-in Extensions, hair clips, and a brush


Steps:

1. Preparation

Brush Thoroughly
Detangle your hair by using the Cashmere Hair Extension Brush or a detangling brush and ensuring that there are no knots remaining. This step also helps in easy application of the extensions and allows it to blend in well.

2. Applying the Extensions

Section Your Hair
Begin with a horizontal section to the right of and one inch or slightly above the nape using a tail comb. Tie up the remaining hair neatly so that it will not interfere with the hairstyling process.


Braid the Bottom Section

If your hair is signicantly shorter than the extensions or you have a more blunt haircut, a neat trick is to braid that bottom section of hair and secure it up and out of the way. Thiss give the bottom track something to anchor in to and also eliminates that bottom section of hair that tends to peak out underneath an make it obvious that you are wearing extensions.


Apply the 3 Long Tracks

Start off with the 6" wide track, this is going to hug around the shape of the head. You're going to start from the middle and work your way out clipping these in place. This will allow for a more secured application so that when you do style them and wear them throughout the day, you'll have more security and longevity to the hairstyle.

Repeat this step going into the next 7" track. You're going to go one to two inches above that horizontal part, make another horizontal part. This track is an inch longer and this is just going to hug the shape of the head. The last longer weft is out top weft which is 8" wide. It is going to be applied in the same technique again, an inch to two inches above that horizontal section. Our top weft is our longest one. This is again going to follow the shape of the head here. After these have been clipped in and styled, you can drop the remaining hair we sectioned on top in the back quadrants and style the remaining hair together with the extensions.


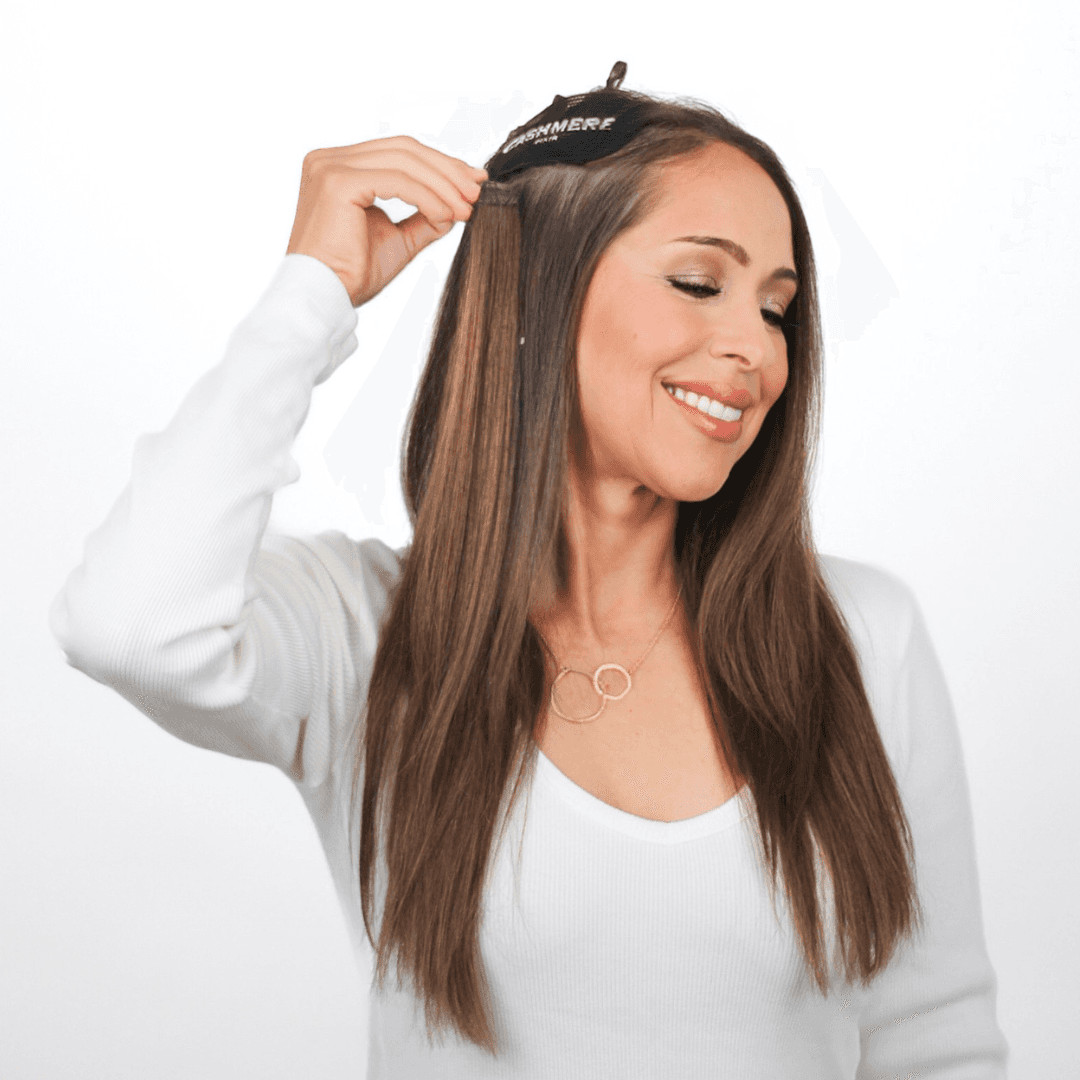
Apply the 4 Side Tracks

A great tip to ensure your front tracks will not peek through, is to take a tail comb and if you can see through it, leave a bit more hair in the front to conceal the weft. Go at a slight diagonal angle and place these shorter three-inch wide tracks in.

After that has been placed and styled with your natural hair, you are going to do the same step with your second side piece just above the first one. You can even go a half-inch to an inch higher. Again, style at a side diagonal angle. You don't want to get too close to your natural parting because you don't want these tracks to be exposed. You are then going to drop the remaining hair on that side and you're going to style the hair with the extensions. You'll then repeat these same steps on the other side.

woman clipping in an extension track in a slight u-shape

4. Shape Your Tracks

If some tracks feel too wide, try clipping them in a slight U shape for a better fit:
Steps:
Comb the hair above the last track leaving some of your hair to cover the extent of the previous track you clipped in.
As a result, place the middle clip slightly lower than the outer corners to form a U-shape that makes the track to fit correctly along your head.
woman teasing hair before clipping in extensions

5. Tease for Coverage

To easily conceal your extensions, especially if you have finer hair, teasing can be a game-changer:
Tools Needed: A Cashmere Hair brush is another very ideal hair brush for everyone to use.
Steps:
Lightly backcomb the top layer of hair a little above the extension.
Lay your hair around your head, targeting the upper layer of hair and avoid pulling out your hair.
This technique provides voluminous appearance and also useful in camouflaging the extensions, if any.
We hope that these tips make the process of clipping in your Cashmere Hair extensions easier. In the video featured above, our CEO Rachel is wearing our 20" Rodeo Drive Blonde Shade. If you want more information feel free to check out our channel for more videos, you can also visit our website to see more colors we offer and speak to a color-match specialist to find your perfect match!

Featured Posts