September 1st, 2023
How To Easily Fix A Broken Extension Clip On Your Extensions At Home
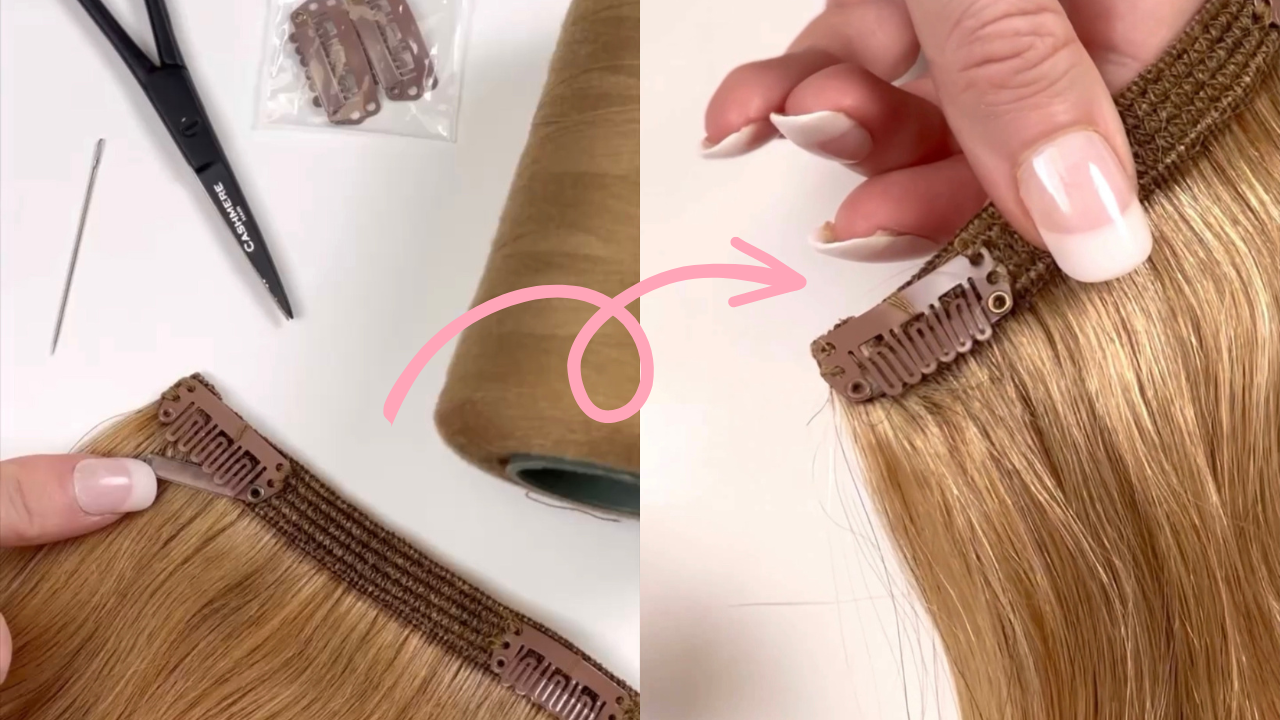
If for some reason, a clip on your hair extensions breaks, you can easily repair it at home with just a few simple supplies! All you need is a needle, some scissors, the clips that came with your clip-in extensions, we always offer some extra clips, and a thread in a similar color. In this blog, we will walk you through step-by-step how to easily repair your broken clip at home! Click the linked video above to easily follow along each step.

Carefully Remove The Broken Clip
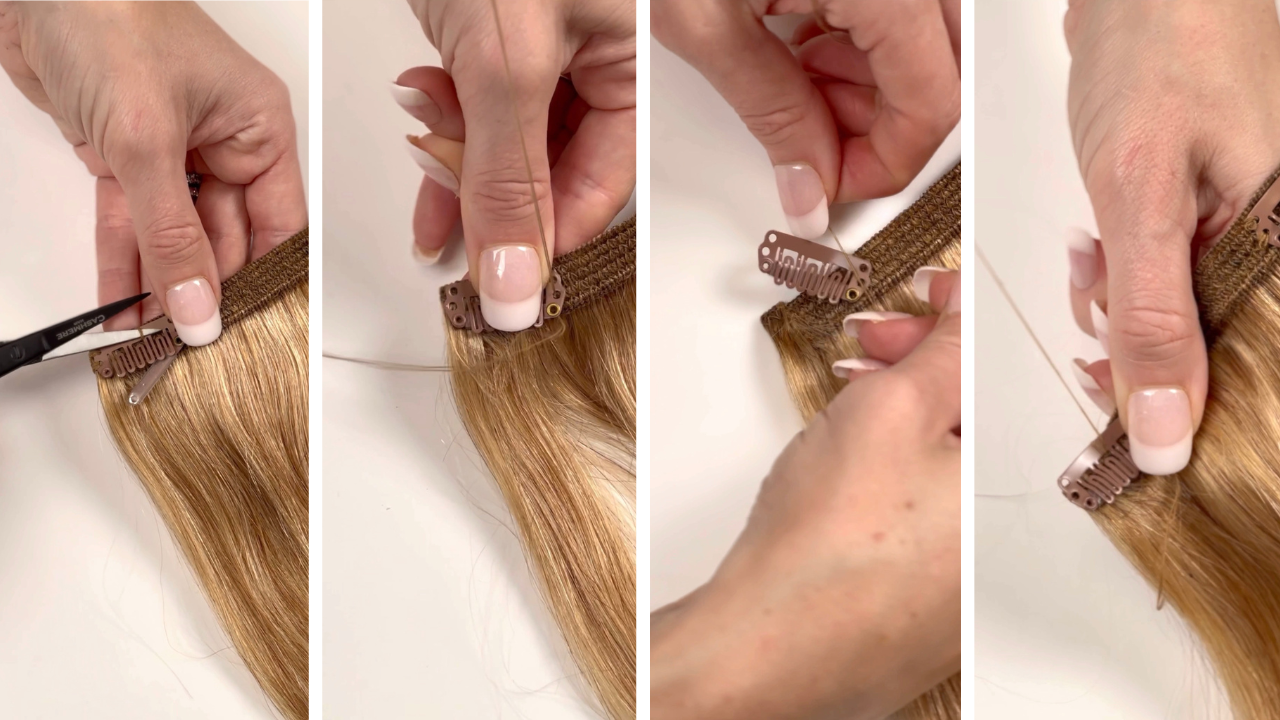
The first step is to gently remove the broken clip. You will want to start by cutting the center thread that attaches the clip to the hair extensions. There's two stitches on either side of the clip as well, so you'll want to stick your scissors in, and cut those threads. Be careful not to cut the actual extensions because it may cause the weft to unravel. Once you've removed the broken clip, you will also want to remove any remaining thread that attached the clip to the weft.

Begin Sewing The New Clip
Then you can take your clips and you want to get a pretty good amount of thread to avoid running out in the middle of sewing. You'll want to double that thread over and make it stronger to ensure it stays secure. Be sure to place the clip onto the weft exactly where you want to start sewing it at. We always prefer to start on the inside.
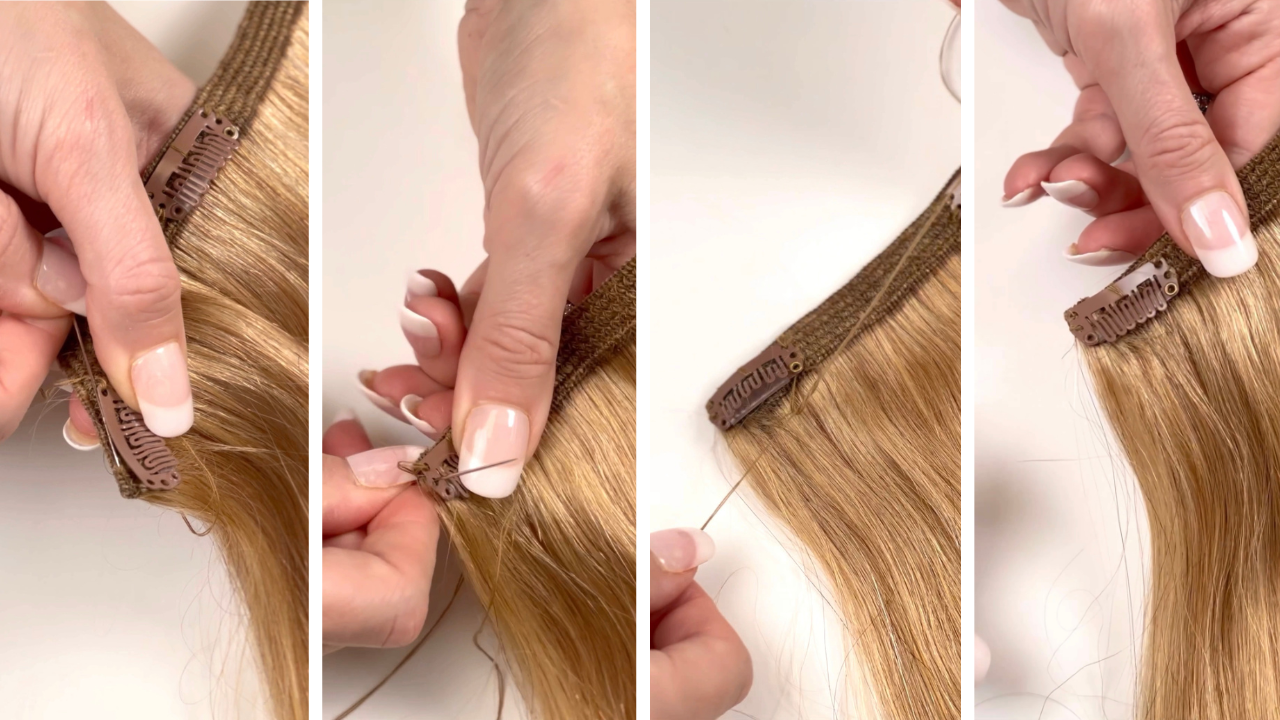
On the first stitch, we're going to stitch under and try to get it through that middle hole. Pull the string taut as you want to try to keep the hair away from the thread as much as possible so you're not getting pieces of hair stuck in there. Loop the needle through the thread at the end to secure it, and then tie a knot to secure that clip on there. Then you're going to push the thread up through the top hole on the other side.
Now, we like to secure it in the middle so in order to do that, you take your thread and loop it through some of the stitches in the back, stitch it through some of those to secure it, and then come up through the middle. When you come back down, try to push it through some of the hair and some of the stitching that's already there so that it wraps around.

Secure It Tightly
Now, you want to hide that string again so run the needle through some of the stitching underneath because you want to get to these other holes now to the other side. Secure this end to the clip and you want to stitch into that second hole and secure it.
Now that it's pretty secure, secure the other end the same way. We like to run it back through some of this stitching underneath the beginning thread, and then tie a knot. It hides it nicely. Now, I'm going to make a knot with these two threads. On the last knot, I like to wrap it twice. You do a regular knot and then you loop it in through one more time. This really secures that knot. And then, take your scissors and cut the remaining string and there you have your fixed clip!
