August 9th, 2016
Low Bun Tutorial Using Extensions
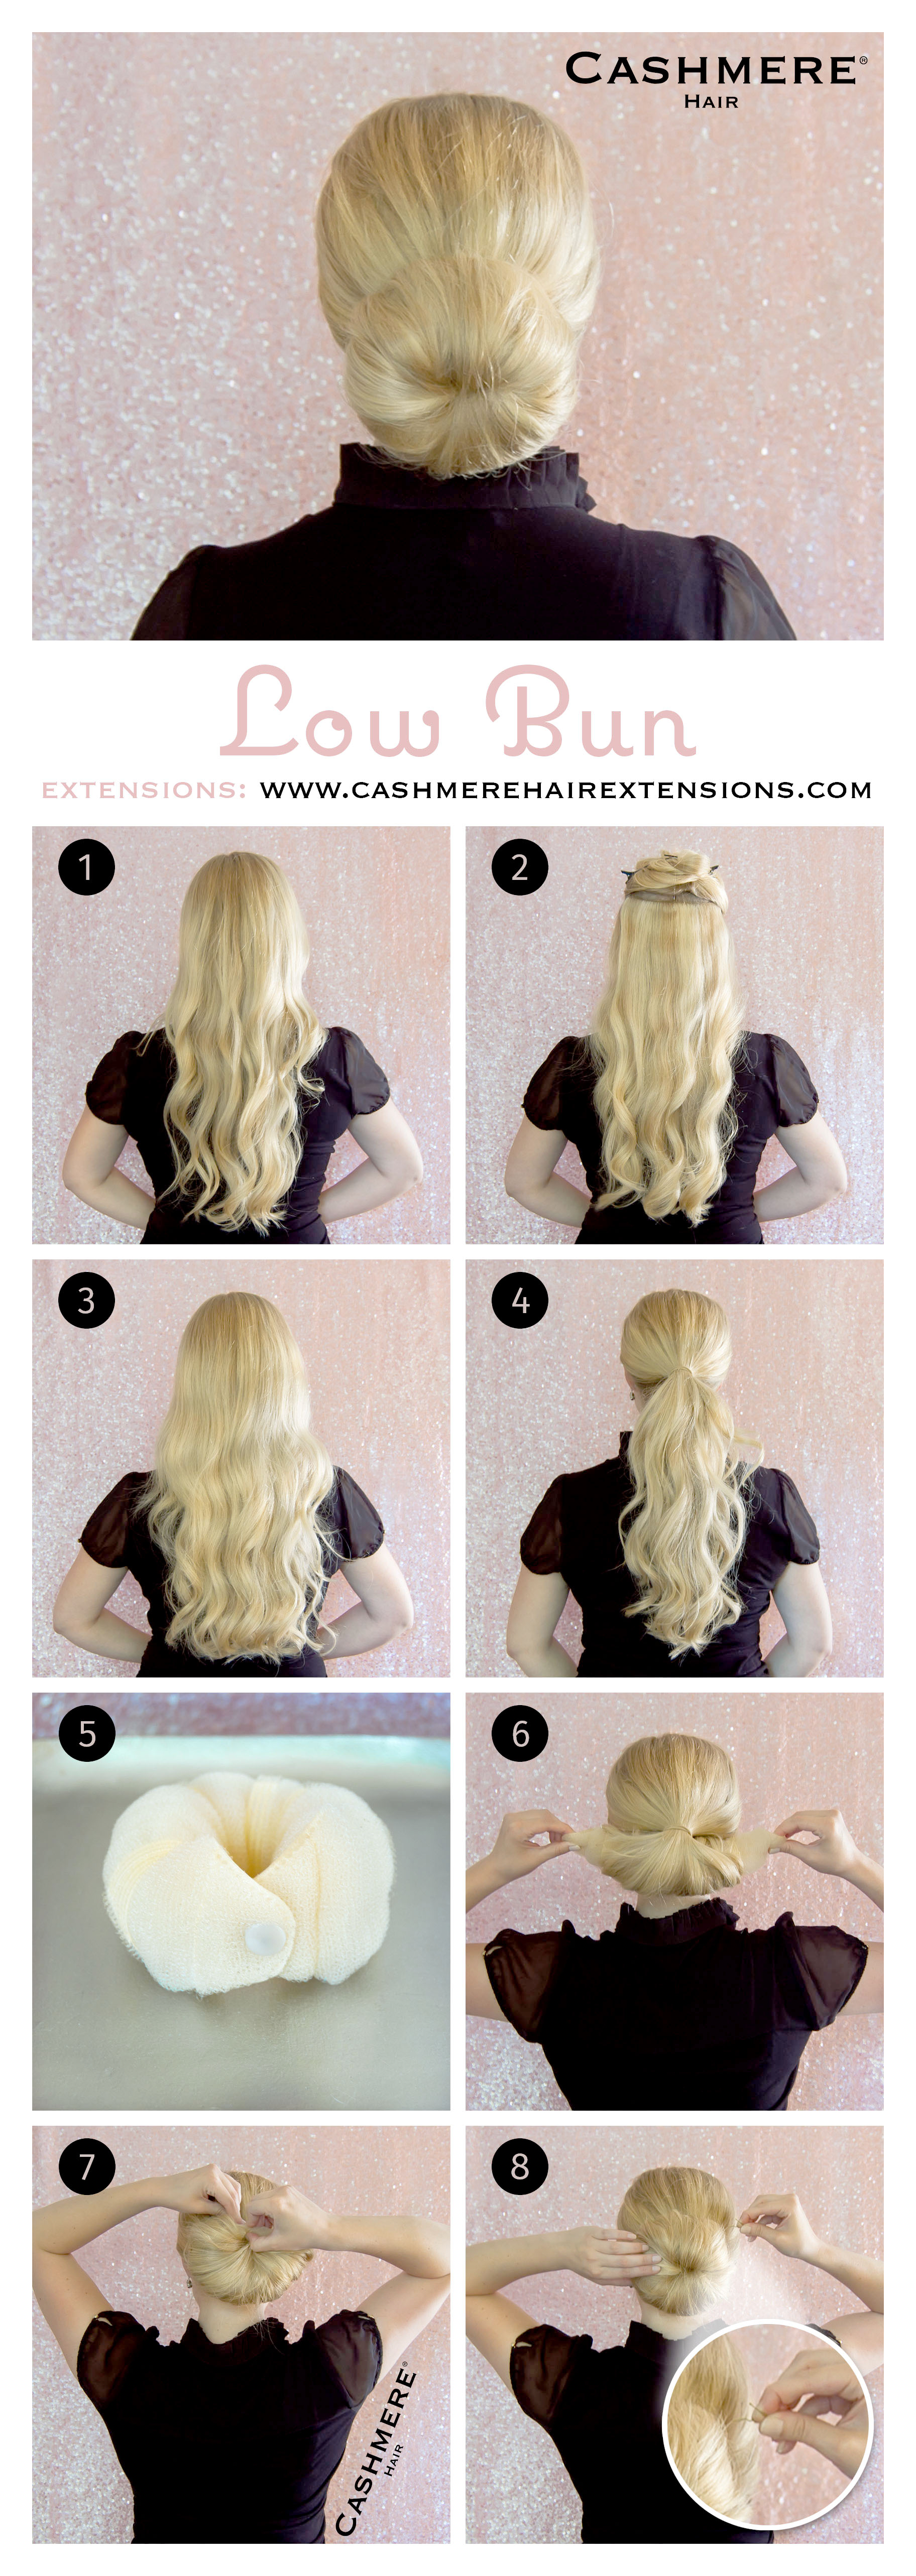
Do you want to look sophisticated and polished even when you skipped this morning’s shampoo? The donut bun has been popular for a long time, making that chic bun easier than ever, but did you know that you can also create this bun using Cashmere Hair clip in extensions?
Check out this low bun tutorial and try it yourself. Recreate the look and tag us on Instagram at #cashmerehair or @cashmere_hair so we can see your buns!

Step-by-step Instructions
Shade of Cashmere Hair Pictured: SUNSET BLONDE 20" LENGTH
Step 1: Brush through hair. Optional step: Spray dry shampoo at roots and brush again.
Step 2: Clip in Cashmere Hair Extensions. Use two or three tracks in back for desired fullness. Side pieces are not necessary since you are pulling your hair back.
Step 3: Tease hair at crown above extensions. Use hairspray for extra hold and lightly brush over hair to smooth out.
Step 4: Gather hair in low ponytail. Use hair tie similar to your own hair color.
Step 5 & 6: Cover donut with your hair. Starting at ends rolling your way up while tucking hair in and pulling firmly. Try to spread the out hair evenly.
Step 7: Snap donut into place. Spread your hair out around entire donut, making sure hair covers the gap where two ends meet.
Step 8: Secure bun with pins and finish with hairspray. Insert four to five pins around the bun about 1 & ½ inches apart. This will ensure your bun stays in place all day. Always use bobby pins similar to your own hair color as well. This would be the time to add any cute accessories, as desired.
