May 28th, 2016
Boho Festival Braids Tutorial
With festivals and boho vibes on trend for summer, I thought this would be a fun tutorial for today! For this hairstyle, we're going for that "effortless" appearance, so don't stress on making it perfect. The braids should be different sizes to give it all the texture you need!
You can also do tighter curls, with precise braids for a more elegant occasion! xo
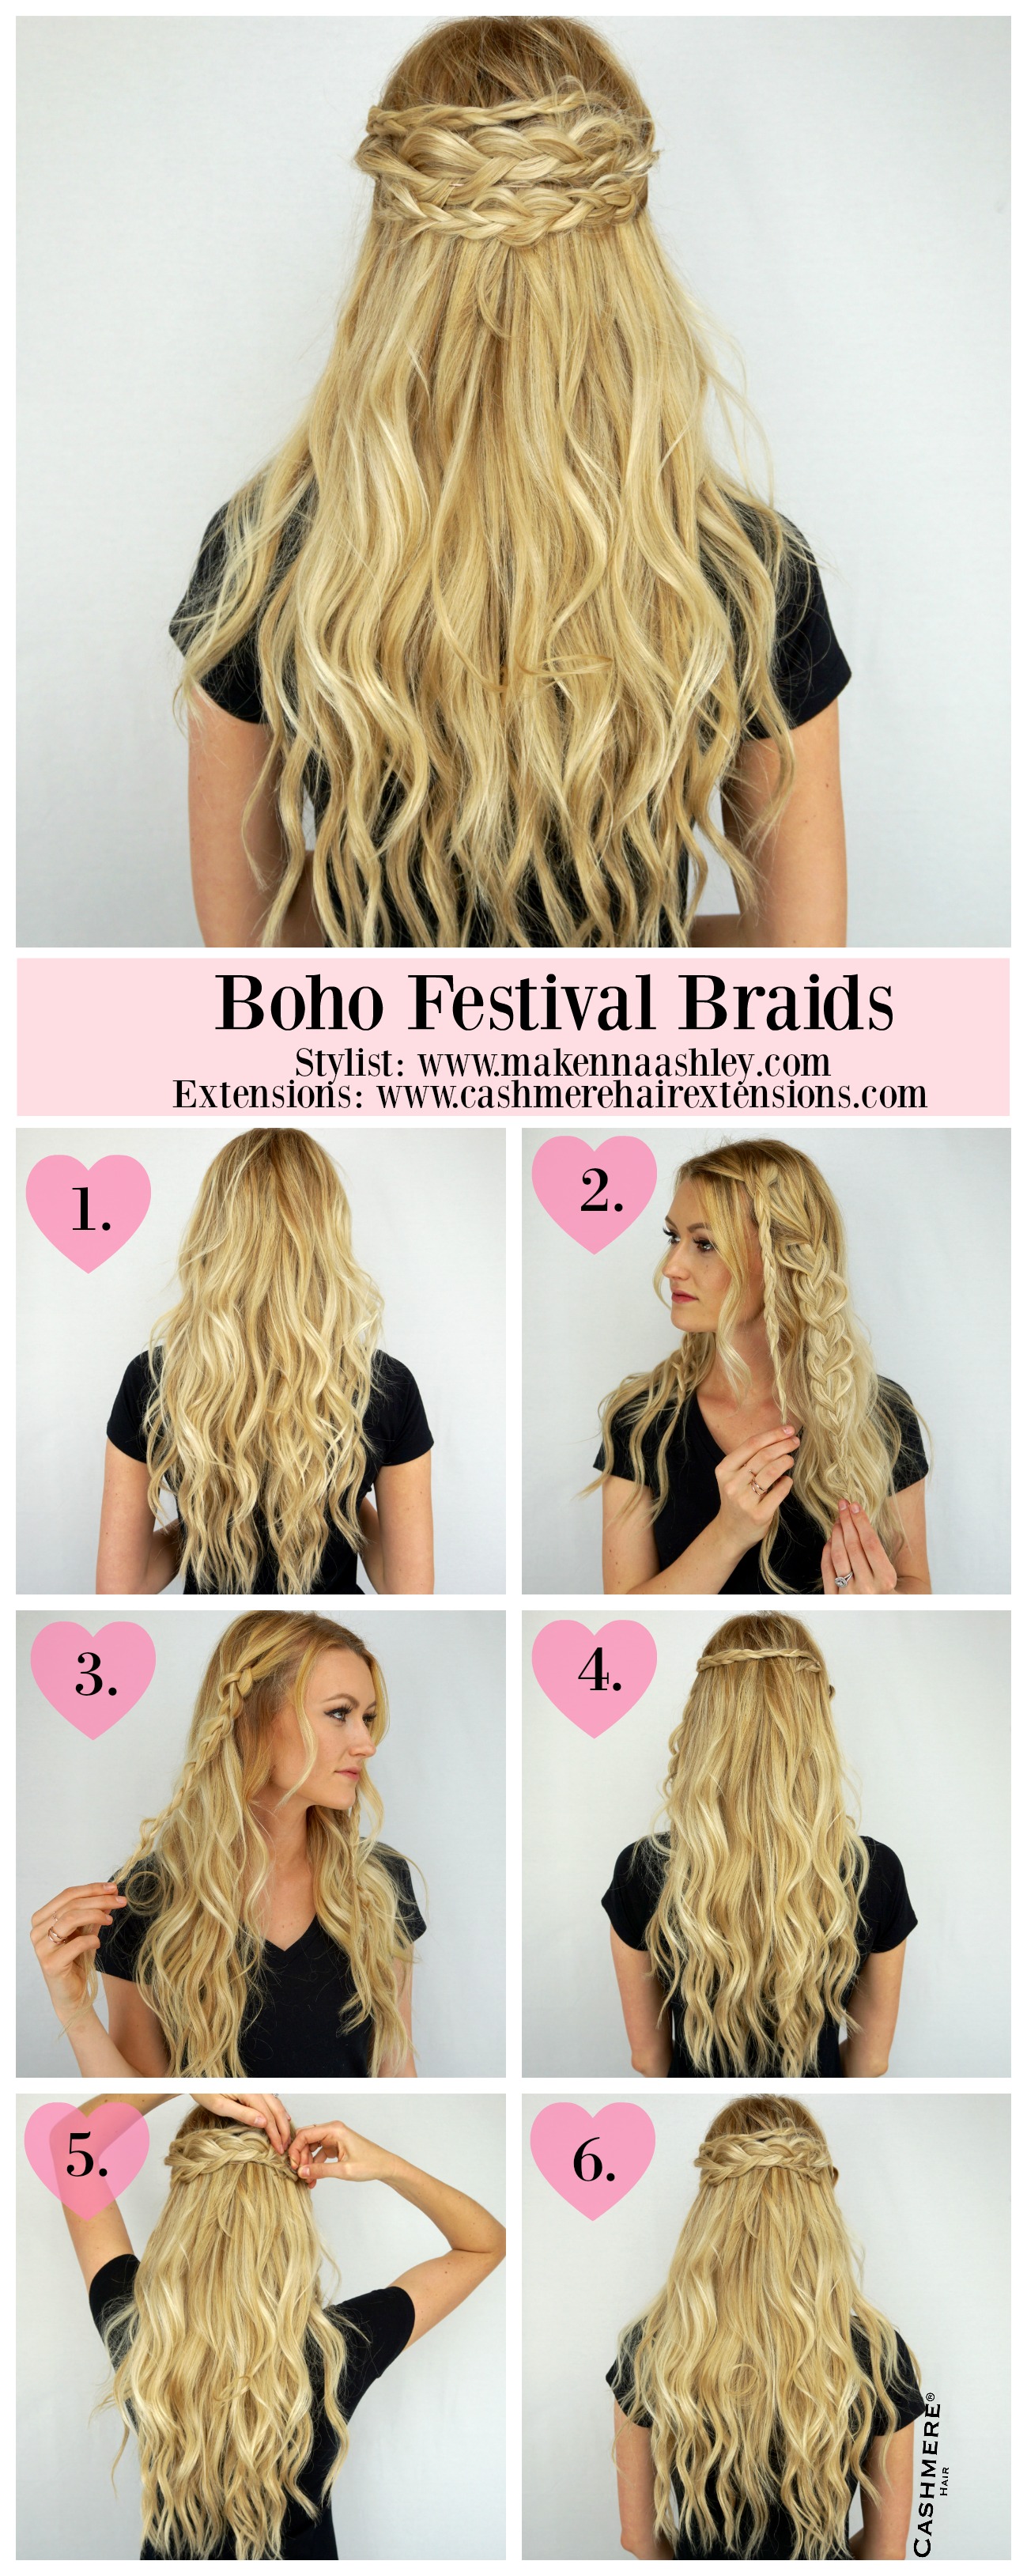
Step 1: Style hair as desired. You can do this hairstyle with straight, or curled hair. Straighter for a sleeker look, and tighter curls for more of an elegant look. I chose loose waves to go along with the boho vibes.
Step 2: Section your hair into two sections, braiding each section making one braid larger than the other. I chose to do this part on my left side, as this is where I part my hair. I did the top braid smaller, because my layers are shorter on top. I pulled out the bottom braid a lot to make it look as full as possible.
Step 3: Braid the other side of your hair into one medium sized braid.
Step 4: Secure the smallest braid with a bobby pin, closest to the top of your head. Feel free to use a second bobby pin to aim the hanging piece down towards the rest of your hair, rather than poking by your face.
Step 5 & 6: Secure the biggest braid in the middle, and the medium braid on the bottom with a bobby pin. The point is to have different textures going on, for that messy boho vibe.
Tip: Make sure to tuck the end pieces of the braids into the other braids, using bobby pins. This will ensure you don't have loose ends poking out of your hair!