August 21st, 2016
Knotted Pony
This is such a fun and unique twist on a regular side pony, I just can't get enough of it! It takes a bit of practice, but once you get the hang of it, it will take you less than five minutes to do. It dresses up the pony and gives it that extra touch of elegance.
In this tutorial I'm wearing my 20" inch Cashmere Hair clip in extensions. This hairstyle will look like your hair is a bit shorter once you create the knotted pony, so it's a great opportunity to wear longer extensions to create length and volume for this look.
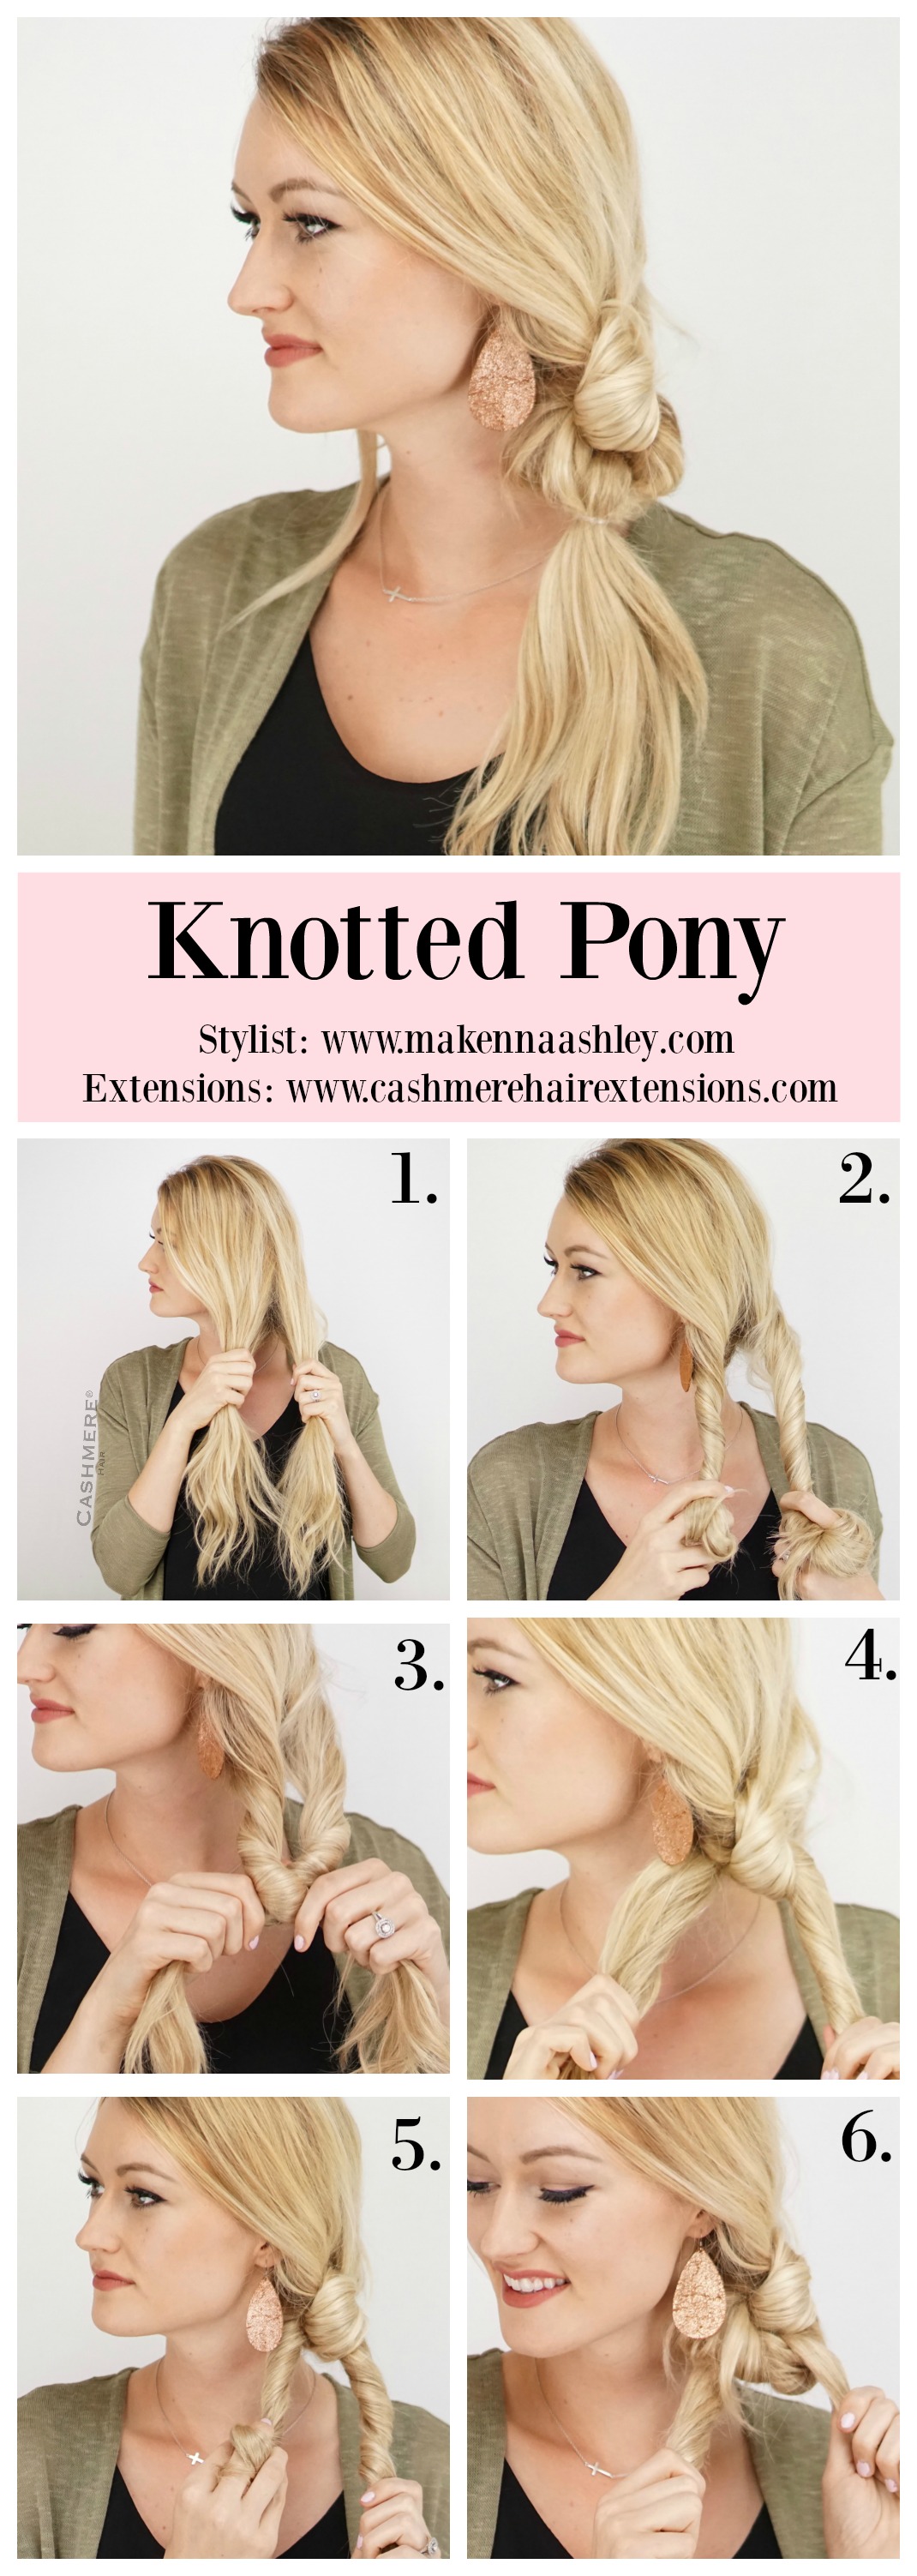
Step 1: To create the Knotted Pony, start by dividing your hair into two even sections.
Step 2: Twist the two sections toward each other.
Step 3: Cross one section over the other, and tie a knot with the hair.
Step 4: Pull tightly on your two sections.
Step 5: Twist the hair once more, going away from each other.
Step 6: Pull tightly on your two sections, and secure with a clear elastic.
*Twisting is not totally necessary, but it does make the hair easier to work and less tangled with while tying the knots. I twist them inward first, then outward, to keep up the flow of the hair.
Tip: The knots do use quite a bit of length, so if your hair is shorter, I would recommend only doing one knot, instead of two. Again, this is when your extensions come in handy!