May 1st, 2016
Twisted Pony Tutorial
I always love a good pony tail, and adding these twisted pieces will give it that extra spice you're looking for! It's a very simple look to achieve, and takes just a few extra minutes. This hairstyle would be perfect for a hot summer day when you want your hair out of your face yet still want an eye-catching hair-do! :)
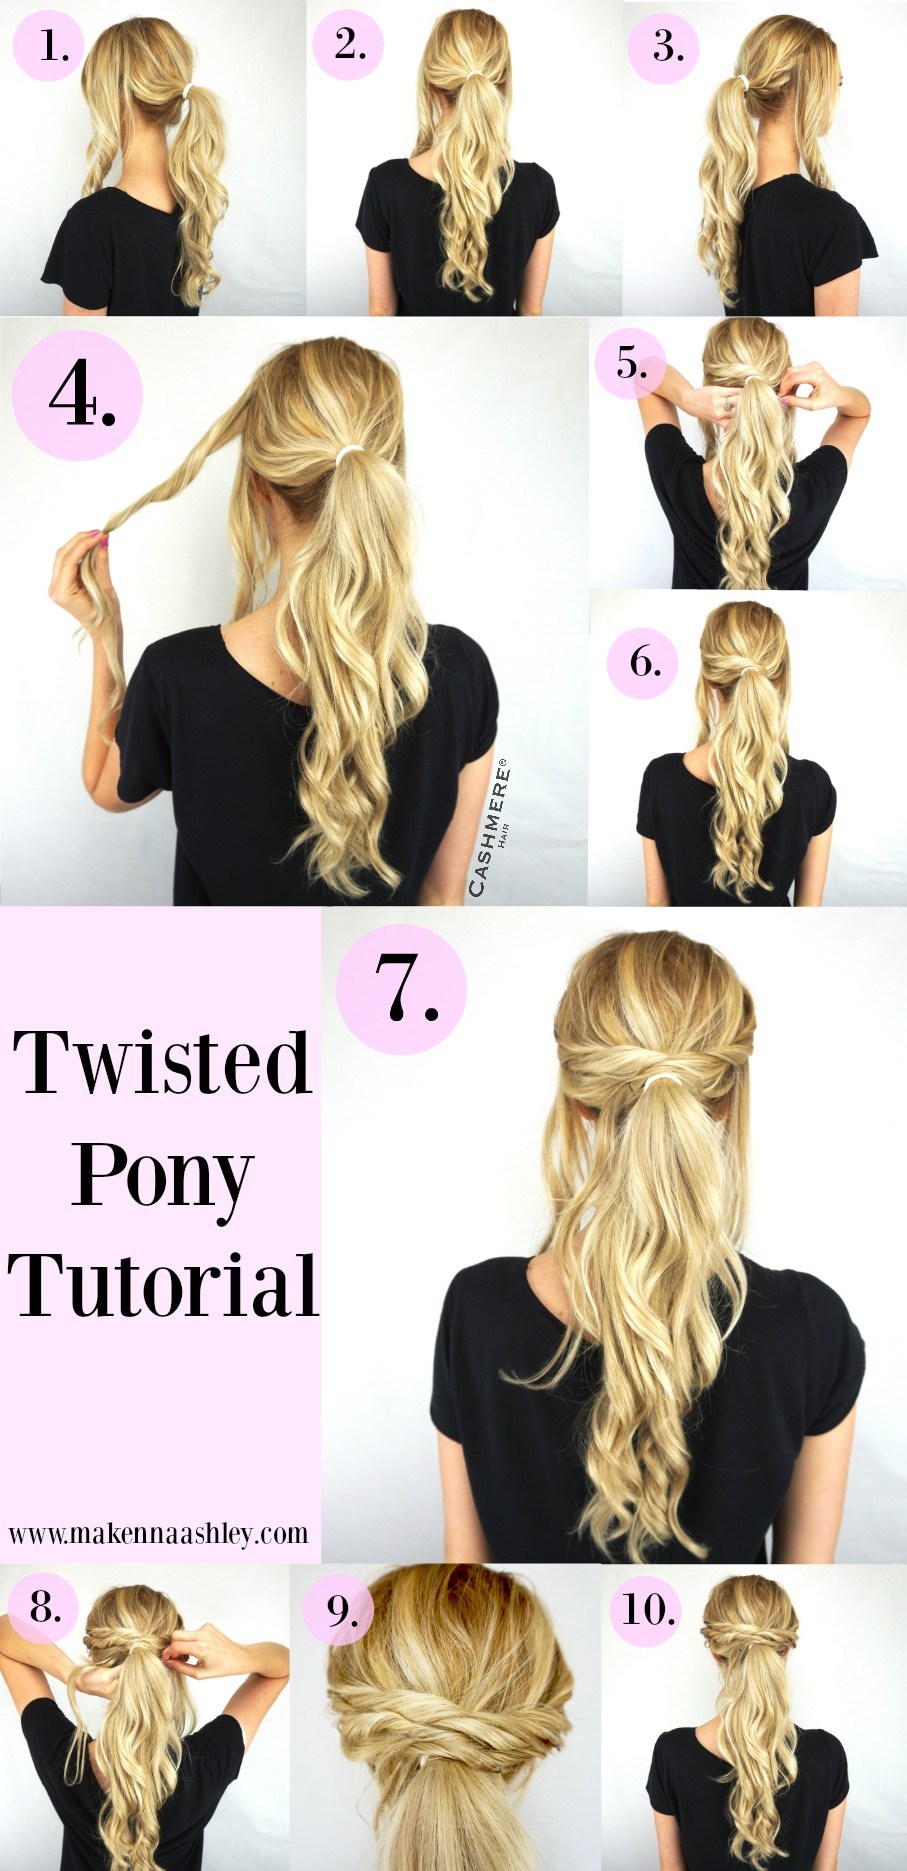 Step 1,2,3: Put your hair into a ponytail, leaving out three inch sections on each side. You can adjust your pony tail to your personal preference, (high, low, middle.) Leave out enough hair on each side to make the twists. I left about three inches out.
Step 4: Cut the left section in half, horizontally, and twist this hair towards your pony tail. It is crucial that you are twisting the hair towards the back of your head! If you twist it towards your face, it is going to make the look less smooth.
Step 5: Wrap the twisted piece over your pony tail. You'll want to make sure you wrap over, not under, to achieve this look.
Step 6: Attach the piece with a bobby pin. Make sure you attach the piece very close to the pony tail. If you attach it further out, it's going to leave you with random hanging bits far from the pony! Another tip - Use similar colored bobby pins and hair ties as your hair color, this will help with hiding them and making your look seamless!
Step 7: Cut the right section of hair, horizontally, and twist this portion of hair towards the back of your pony tail.
Step 8, 9, 10: Continue alternating sides until you have pinned up all the remaining hair from the right and left sections.
Thanks for reading, be sure use the hashtags #makennaashleyhair and #cashmerehair so we can comment & like your recreations on Instagram!! xo
Makenna is wearing Cashmere Hair Clip In Extensions in Sunset Blonde (18/22) in the 20 inch length.